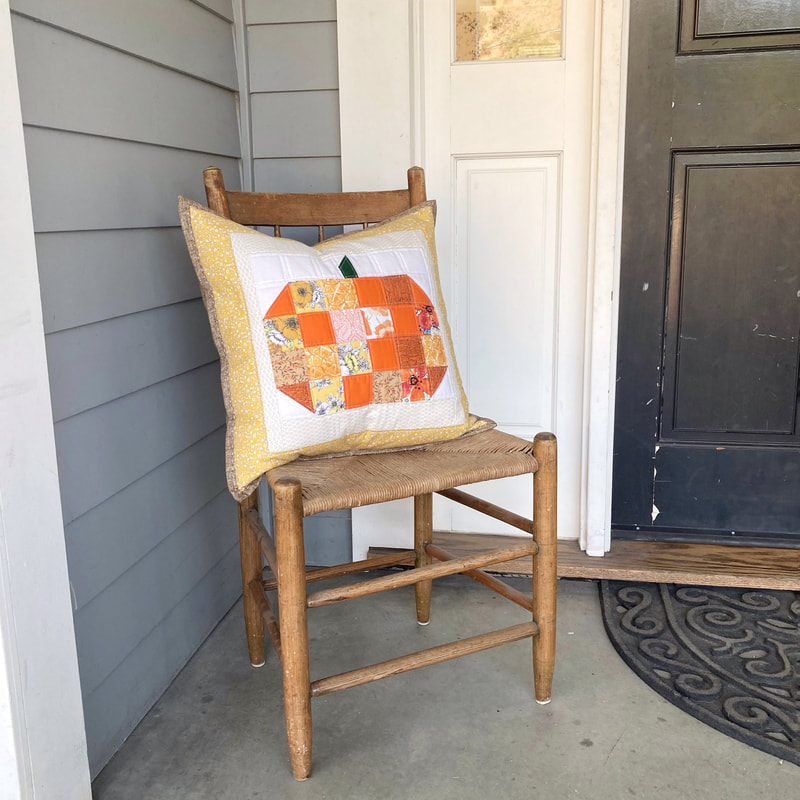
 Look at this super cute fall pumpkin pillow! It is so easy to make and such a perfect fall project! 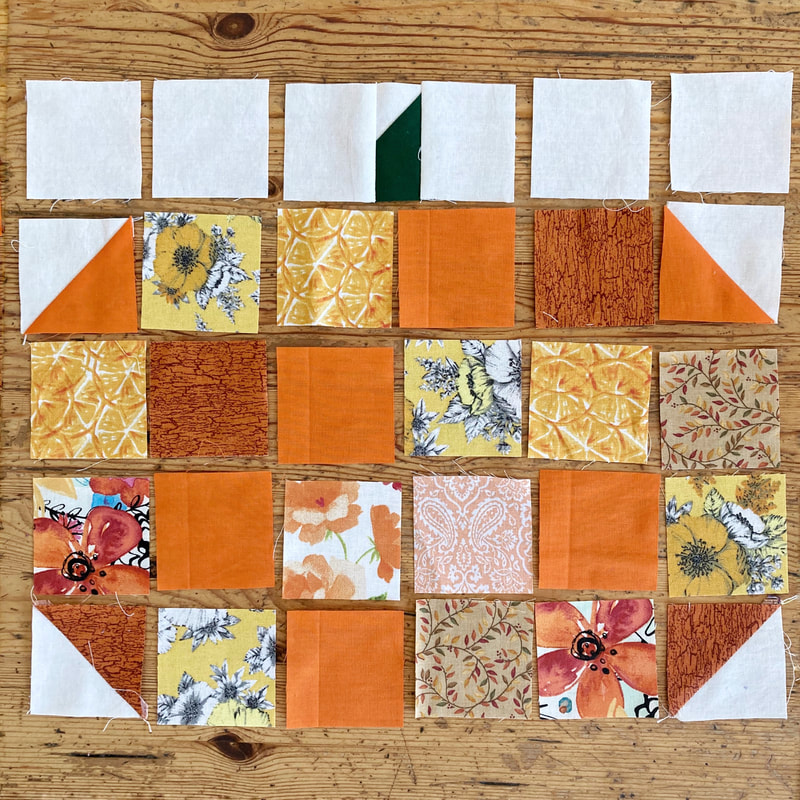 For the pumpkin, you will need 24 orange 2.5 inch squares, I just used some scraps that I had. You will need 1 green piece that is 1.5x2.5 and 11 white/background 2.5 squares. For the corners, line up one orange and one white squares (right sides together) and stitch on the diagonal. Trim and press open. Do this for all the corners. For the stem: Take your green piece and snowball the top with a white 1.5 in square. Trim and press. Add a white square to each side then trim so it is 4.5 inches long. Trim from each side so the green is in the middle. 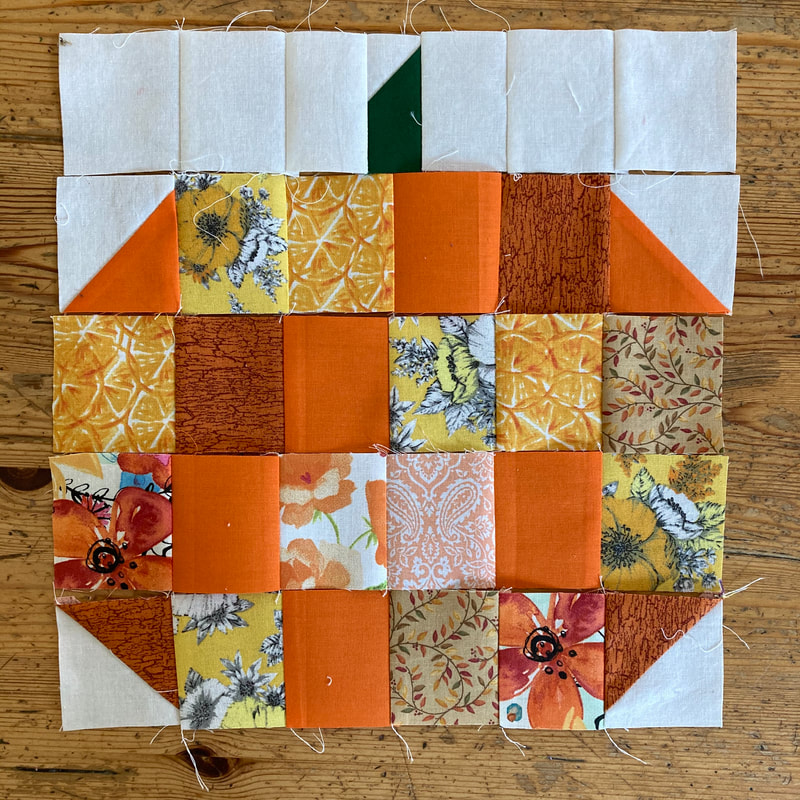 Sew into rows and press seams opposite ways so that the nest together. 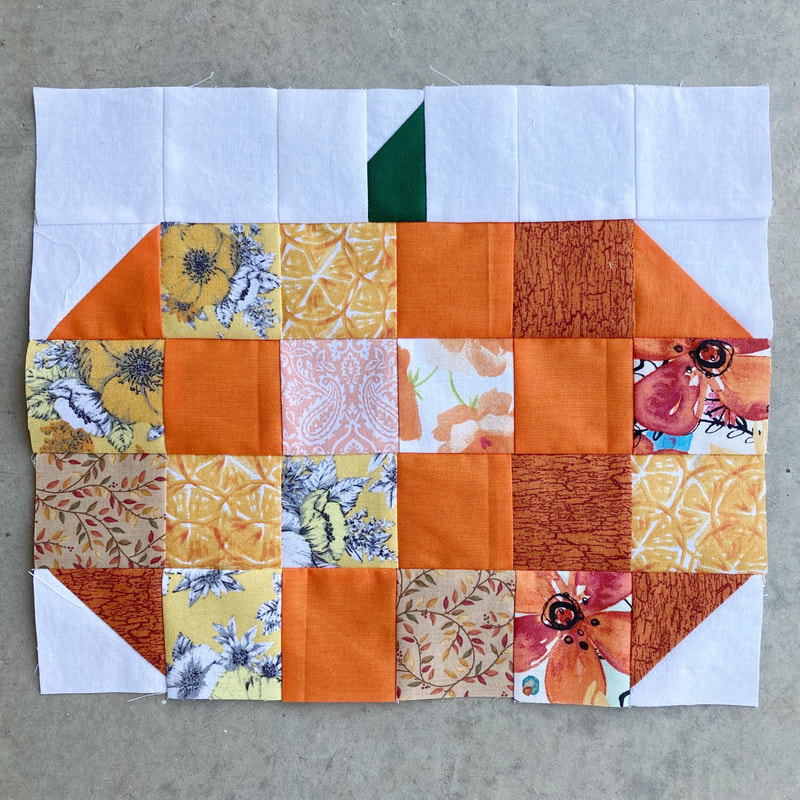 Sew the rows together to complete the pumpkin. (I accidently flipped two of my rows and didn't realize till after it was done.) 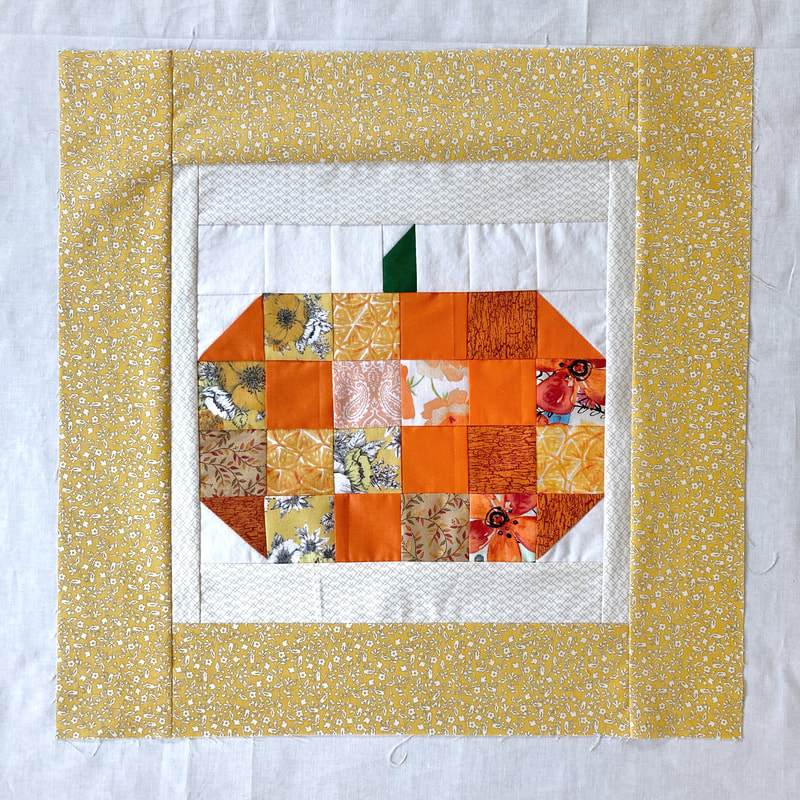 I added two borders so I could make this into a pillow. The size of your borders will depend on your pillow form. 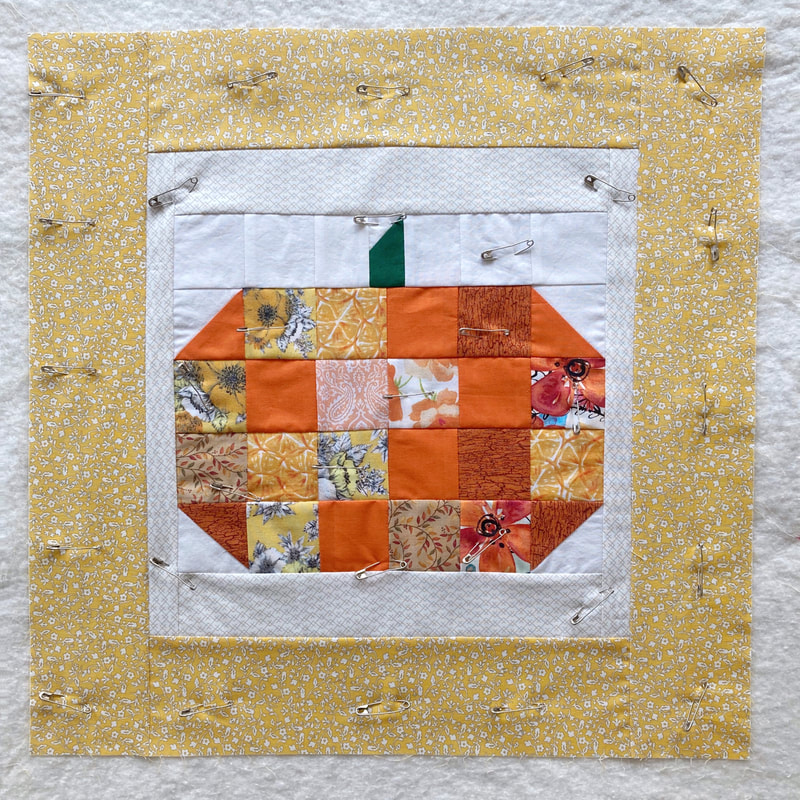 Pin basted and all ready for quilting! 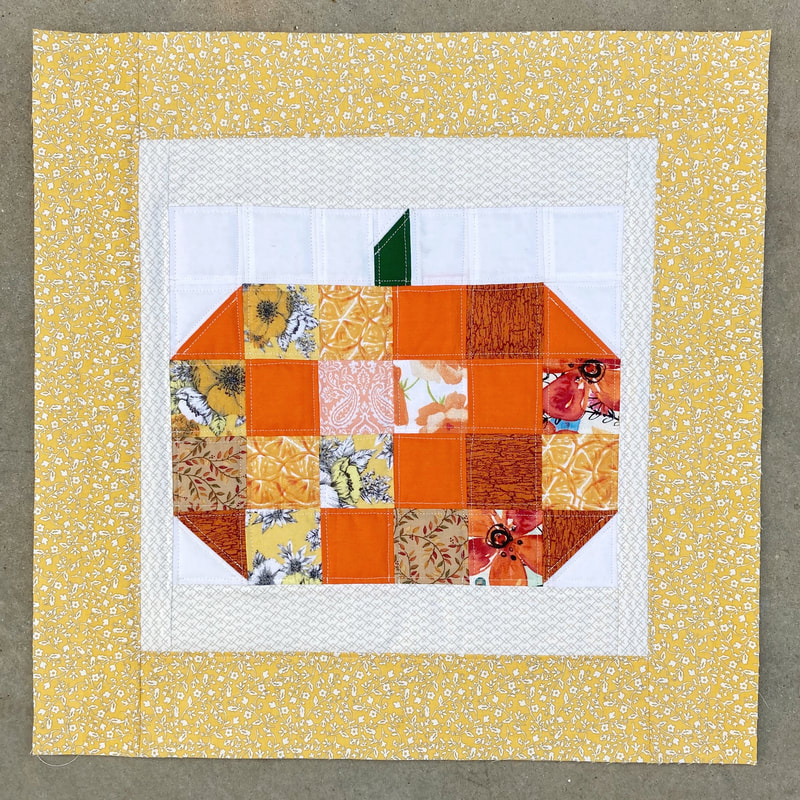 All done quilting! I just echoed the squares with stitching. This would be a cute wall hanging but I turned it into a pillow by adding an envelope back before binding it. There you go! Now you can go make a super cute fall pumpkin pillow. If you make one, be sure to tag me @browneyedquilter!
Thanks for reading! Emily
0 Comments
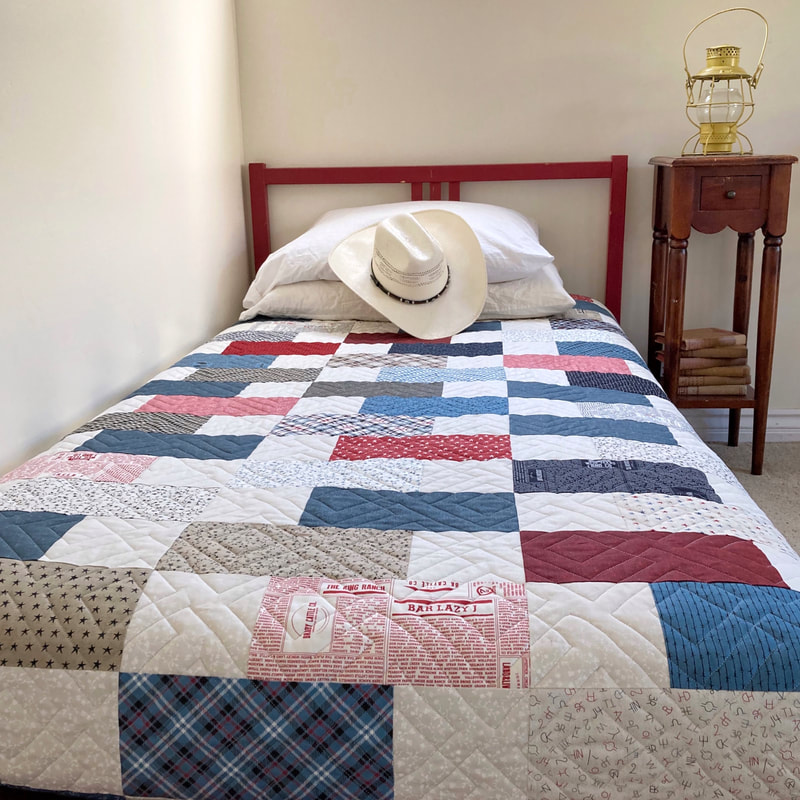 I just love this quilt! It is made with a layer cake Branded by Sweetwater for Moda. I used Diary of a Quilters Easy Bricks pattern and adjusted the pattern so the bricks would go horizontal instead of vertical. 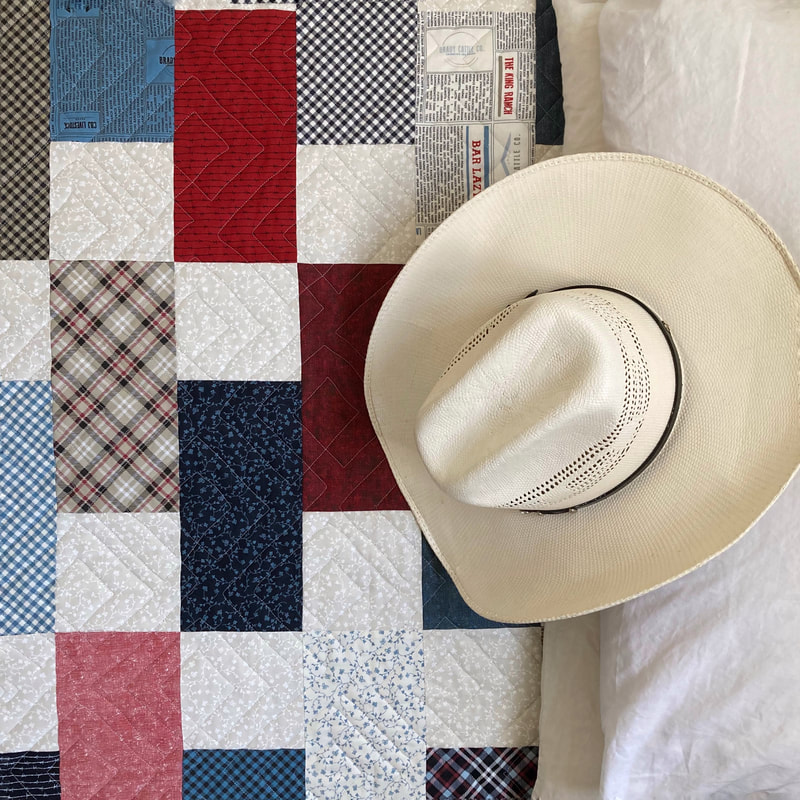 This is quilted with the pattern Squared and I love how it complements the brick pattern. 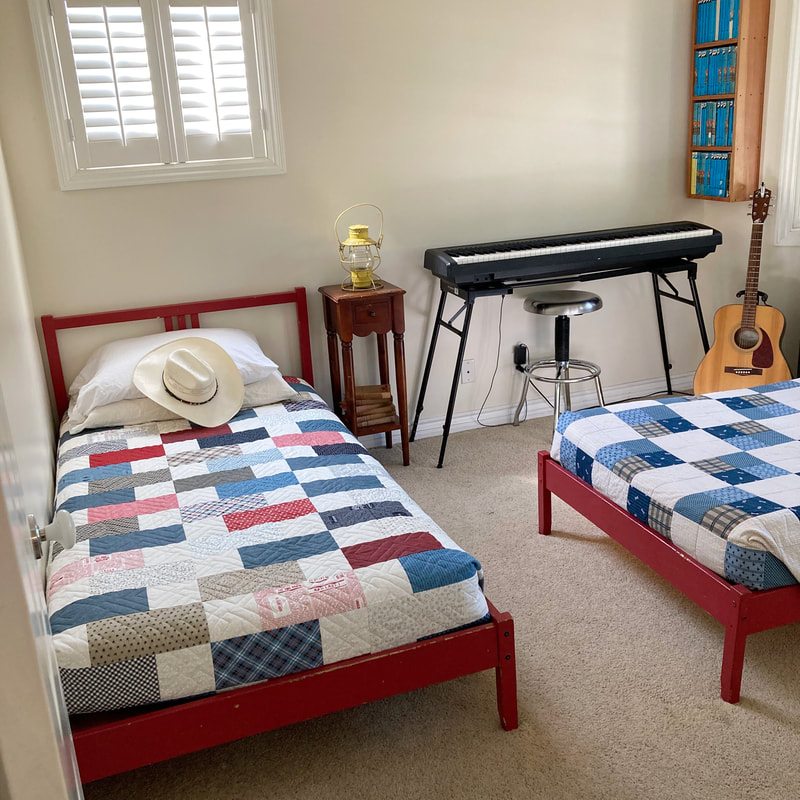 I put these quilts in my brothers bedroom so I could take pictures and when they came in and saw them, they told me they liked it so much that they had to stay there. I love when quilts are used and loved and I am glad my brothers like them! 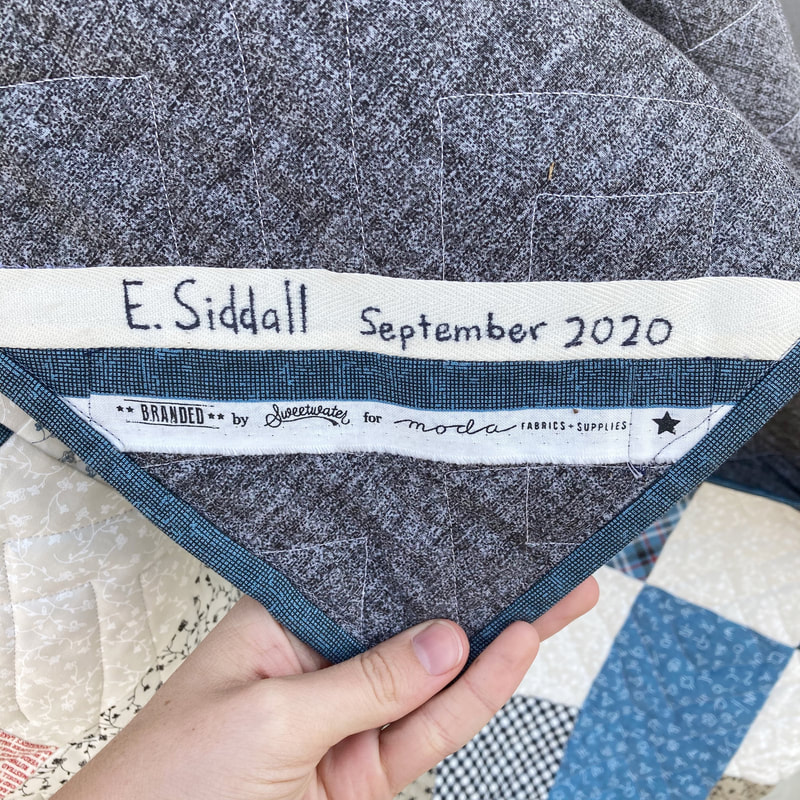 I love to incorporate the selvedge in the label.
|
CategoriesArchives
February 2021
|
 RSS Feed
